Creating A Component Library
I am often asked “How do I create my own components library?”. This post will explain in detail. After reading this post and watching the video, you might also want to see a related blog called Creating a Library of Moldings & Trim.
Location of Component Folders
Components are stored in the Components libraries accessed by the Components dialog box. Component developed by the user and which are in the user’s model are stored in the In Model library. SketchUp comes with sample models stored in the Components library. As a user you can make your own library and save components, or even save entire models in a library. Let’s look at where things are stored.
Your SketchUp File Locations
 One of the first things you should do when you load a new version of SketchUp is to set up the location you wish to store your SketchUp files. I store all of my SketchUp related files in a folder called:
Master SketchUp Directory = C:\Users\jpz\Dropbox\SketchUp Files\
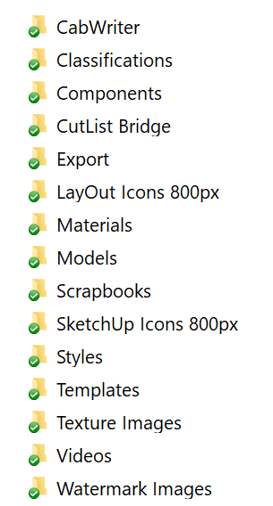
Within that folder I have a number of folders for storing different types of SketchUp files. The image at right shows fifteen sub-folders of my Master SketchUp Directory. Notice in the Master SketchUp Directory all these files are stored in my Dropbox so that I can access them with any of my devices including my mobile phone. This is useful if I want to show any of my models to a client using my SketchUp mobile app.
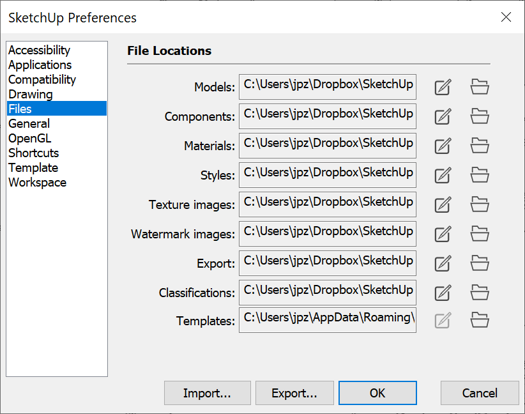 To let SketchUp know where you wish to store various files you have to set up your Window > Preferences Files page shown left. For each File Location type name in the SketchUp Preferences I have set up my preferences to point to a Master SketchUp Directory sub-folder of the same name. The only exception is the last one called Templates which SketchUp will not let the user change. However, I have a Templates sub-folder that I keep a back-up of everything in the Templates folder that the SketchUp Preferences points to.
If you have the CabWriter extension installed you are required to set up a folder for all of your CabWriter defaults and other CabWriter related files; this is done on the Project tab of CabWriter Settings in the User Default Files section. Similarly, if you have CutList Bridge installed you are required to set up a folder for all list back-ups; this is done on the Lists tab of the Extended Entity Info in the To Select A Directory For Back-up Files: section. In the figure at right these folders are called CabWriter and CutList Bridge respectively.
In-Model Components
 In-Model components are actually stored in your SketchUp model file. They are available to only you, the model’s owner and modeler. However, any component in the In-Model library can be save in a personal library, or uploaded to the 3D Warehouse. If you wish to share a component with the world simply right click on the component in the In-Model library and choose 3D Warehouse > Share Component.
Saving Your Components to Your Library
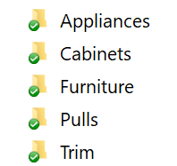 With the SketchUp Preferences File Locations set up as described in the section titled Your SketchUp File Locations, you can now save any of your components in the In-Model library to your Components folder. Simply right click on the desired component in the In-Model library and choose Save As. My Components folder is further sub-divided into other folders as shown at left, and each of those may further be sub-divided, so you will have to navigate to the precise folder you wish to store your component. SketchUp will store your component as a one-component SketchUp model in its own .skp file.
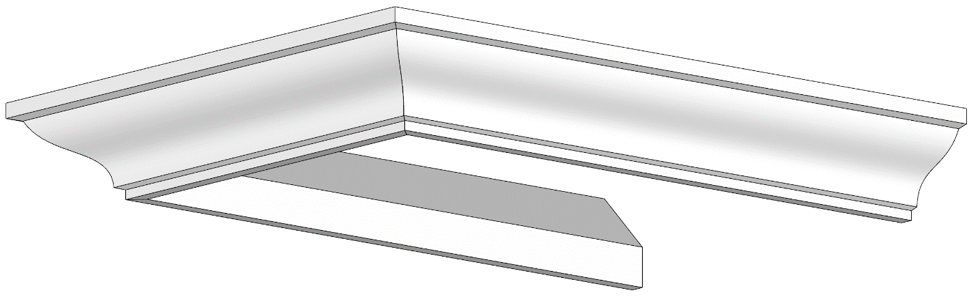
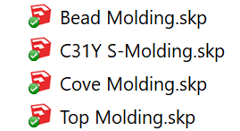 Once you have saved a component in your Components library you can always access it as any other SketchUp model (.skp file). For example, in my C:\Users\jpz\Dropbox\SketchUp Files\Components\Trim folder I have the moldings shown left. If I open C31Y S-Molding.skp with SketchUp as I would with a normal model I get the model below. I can then edit or modify that model as any other.
 Managing & Populating Your Favorites Components Library
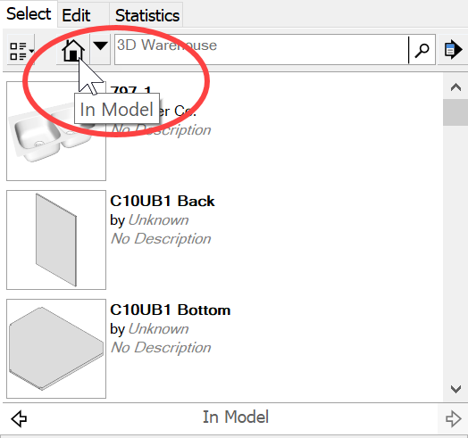
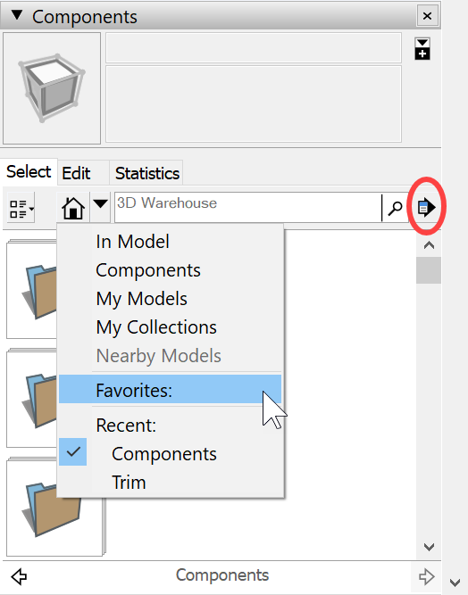 The Components dialog box, in my opinion, is not well designed. I would prefer it behaved more like the Windows File Explorer or the Mac’s Finder. Further, I would prefer it had a category (folder) called User’s Components or User’s Library. It doesn’t. Instead it has the Favorites category that comes with a lot of factory loaded stuff which I never use. So, what I first do is remove anything I don’t want in there so that I can use it as my User’s Library, but called Favorites. In my case that means removing everything that came factory loaded. To do this select an entry under Favorites, click on the icon circled in red at right and choose ‘Remove from favorites’. Keep doing that until nothing is left as shown at right, or until only the factory installed libraries you think you will use are left.
Now you can add your top-level library, or alternatively, you sub-libraries (sub-folders). To do this, click on the icon circled in red at right and choose ‘Open or create a local collection…’. Navigate to the highest-level folder you want to add and highlight it. Click Select Folder. Now click on the icon once more and choose ‘Add to favorites’. Using this procedure, you can add as many folders to Favorites as you wish. You can remove them just as we did the factory loaded stuff.
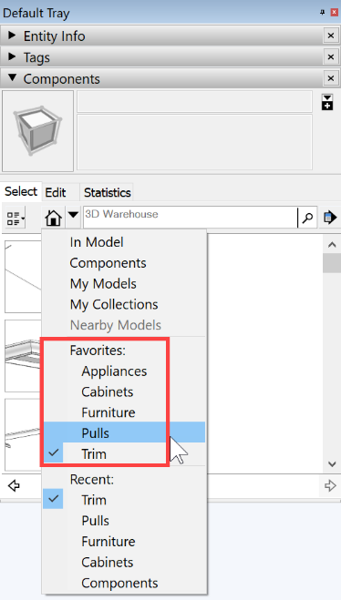 Notice in the image at right that I added the sub-folders of my Components folder instead of my highest-level Components folder to the Favorites library. This makes it a little quicker to access what I want.
Adding A Library Component to Your Model
To add one of your components, from one of your libraries, to the model, simply drag and drop it to the desired position. After you place the component, while it is still selected, look at the Entity Info dialog box. Notice that the definition name is the same as the library component’s file name. It is in fact a nested component. Assuming that the original component was indeed a component in its .skp file, and not simply primitives, the user should, at this point, Explode the component to remove the highest-level component.
Another thing the user should be mindful of is that when you add a component from the library, any Layers (now Tags) associated with the component will also be added to your model, including materials, dimensions, text or any other entity.
Naming Folders & Library Components
I am not a fan of libraries. My libraries are simply a folder with all my past models in it. Any time I want to re-use a component I simply go to a previous model, select the component, use Edit > Copy and then in my current model use Edit > Paste in Place or Edit > Paste. Libraries require library management and that can be a full-time job. Further, they require design and deep thought.
If you are serious about creating libraries spend a lot of time and thought into naming folders and component file .skp names. Really good naming conventions can make a library useful. Poor naming conventions can make them unusable. Every style of woodworking such as residential structures, cabinets, furniture etc. has its own natural taxonomy. Think about that taxonomy in choosing folder and file names.
Creating A Component Library Video
You can view the video below.


Leave a Reply
Want to join the discussion?Feel free to contribute!