CabWriter Comprehensive – Part 9
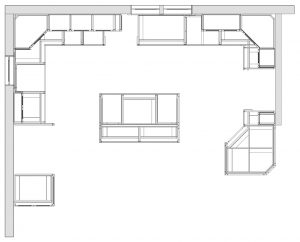
Part 9 is the final part of CabWriter Comprehensive. In this part I finish construction of the walls and show you a few features of the Construct Walls tool. The primary goal of Part 9 is to demonstrate how to create the scenes necessary for architectural and construction drawings. The typical set of scenes might be something like this:
- Perspective Views – Northwest, Northeast, Southwest, Southeast
- Cut List View
- DXF View
- Elevation Views – North, East, West and South
- Plan Views – Base, Upper, Combined Base & Upper
- Ladder Base View
Perspective views are rendered in Camera > Perspective because they are generally photo realistic views designed to show a client, spouse or partner. All other view are rendered in Camera > Parallel Projection because that is the view most appropriate for dimensioning and needed for architectural and construction drawings.
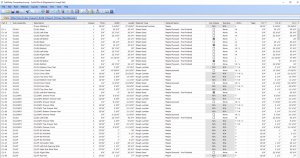
The Cut List view should include all cabinet parts including all rough lumber parts, all sheet parts and perhaps all trim such as the crown molding used in this model. It should not include walls, counter tops, appliances or other non cabinet related components. However, it may include things such as architectural paneling structures. The purpose of the Cut List view is so that everything in it can be selected and then a cut list created using File > CutList Bridge > Export to CutList Plus fx (Excel or OpenOffice).
The DXF view is similar to the Cut List view; only sheet good material parts are included that you intend to cut on a CNC machine. The purpose of the DXF view is so that everything in it can be selected and then DXF files created using File > CutList Bridge > Export to DXF. DXF files for each type of sheet good and each thickness will be placed in a folder.
In both Export to CutList and Export to DXF cases files and folders will be placed in the same folder that the SketchUp model itself is in.
Elevation, plan and ladder base views are created using the SketchUp Section Plane tool followed by the Draw > CabWriter > Create Section From Section Plane tool. The Create Section From Section Plane tool does a number of useful things for the user:
- It solicits from the user a name to be used for both a scene and a layer.
- The scene will be named whatever the user supplies and the layer will be named the same but prefixed by ‘Z – ‘, indication it is a dimension layer. Also placed on the ‘Z – ‘ layer will be the section with faces filled in so that the cabinet and wall components appear as solids. These faces can be hatched using the CabWriter ‘Assign Hatches’ tool, but this is for another video tutorial.
- It composes the scene automatically and creates a CabWriter Section style (which you can see in the Styles In Model dialog box) to ensure correct rendering.
For each of the views generated by the Create Section From Section Plane tool the user can modify the scene to include only the section on the ‘Z – ‘ layer or keep and/or add other layers and Update the scene.
Part 9 is a 51 minute video; longer than I would have liked. I felt it important to complete this course rather than split it into two videos. But this realization of video time gave me the idea to total the length of all videos in this series. The total CabWriter Comprehensive tutorial is 5 hours and 41 minutes. I drew almost the entire custom kitchen in this time, leaving very little to be done off-line. Plus, I did it while teaching and explaining each step. Had I just drawn the model without the added task of teaching I could probably have drawn it in less than half that time. Think about the efficiency of CabWriter. We went form nothing to all the files needed to cut material on a CNC machine in about 3 hours. Of course, in the real world this time is dramatically increased by customer design changes, but you have seen how easy those changes can be made in CabWriter as well.
With this overview of Part 9 lets kick back and run the tape.


